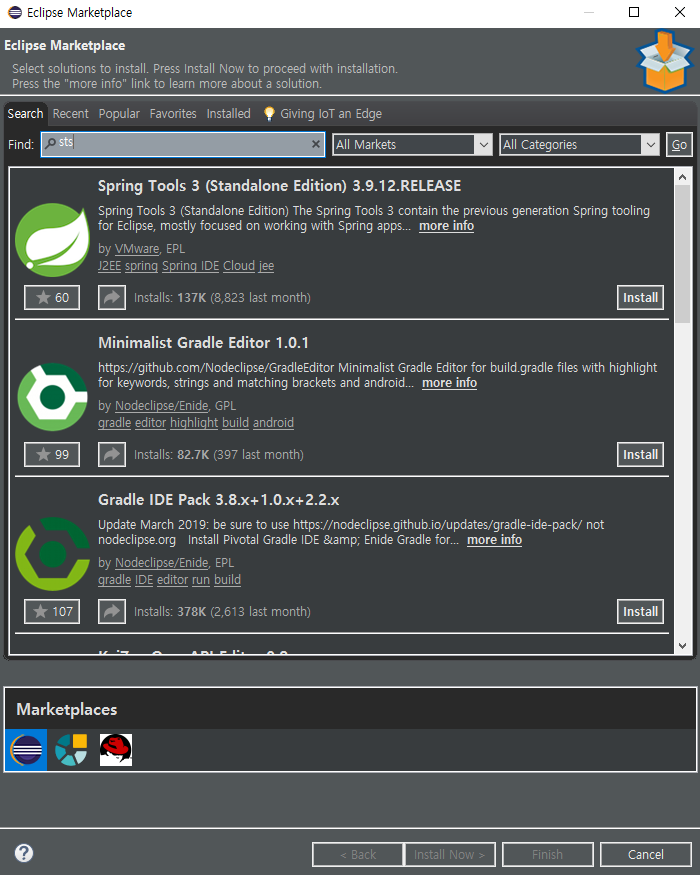
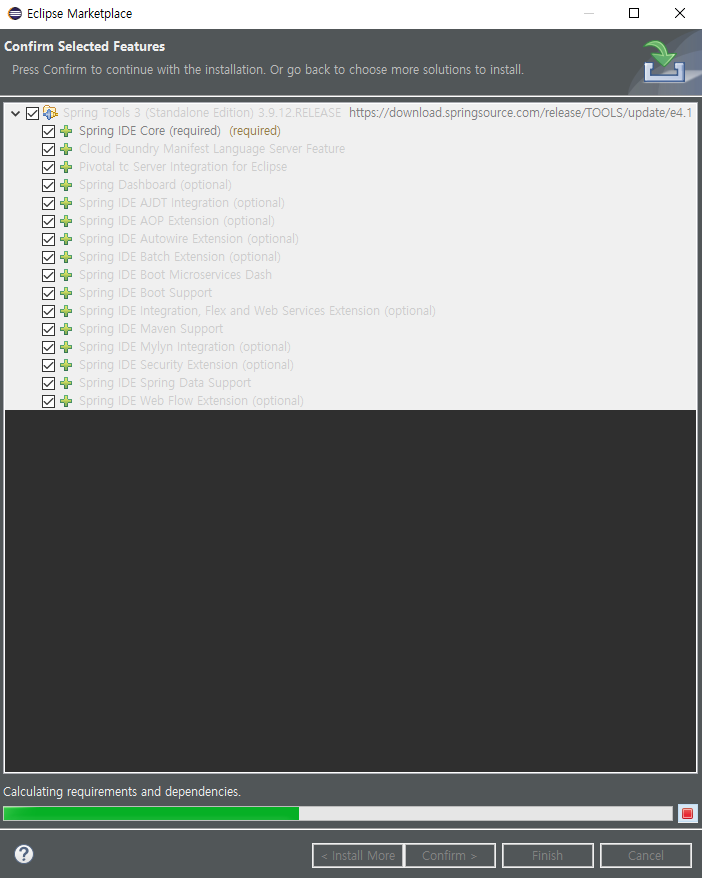
1. STS(Spring Tool Suite) 설치
-
Help -> Eclipse Marketplace에서 "sts" 검색 후 "Spring Tools 3 (Standalone Edition)" 클릭
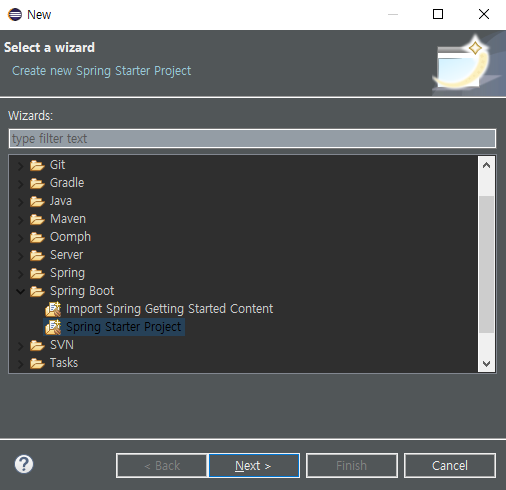
2. 스프링 부트 프로젝트 생성
-
File-> New -> Other -> Spring Boot -> Spring Starter Project
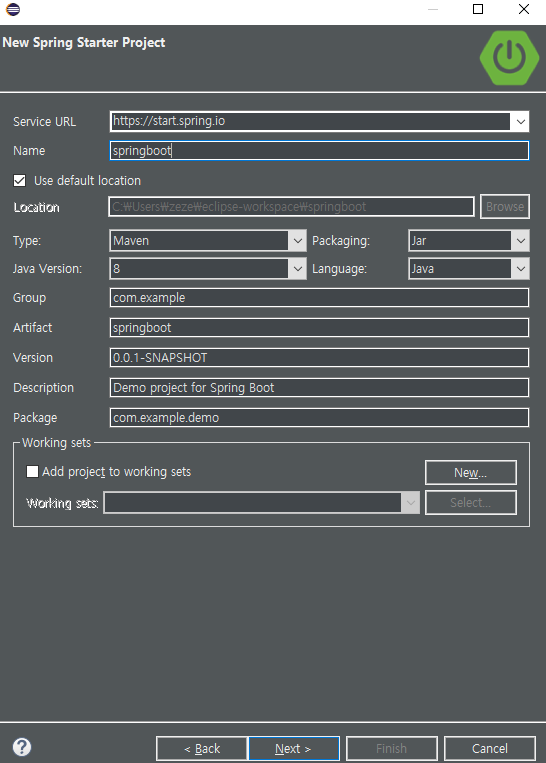
3. 개발 환경 설정
-
default 설정 (Maven, java 8)
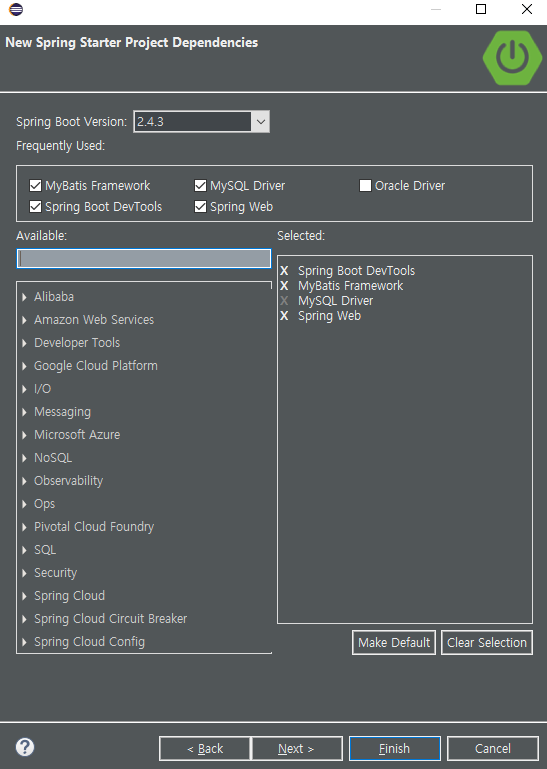
4. 의존 설정
-
Spring Boot DevTools 추가
-
Mybatis Framework 추가 (Mybatis 사용)
-
MySQL Driver 추가 (MySQL 사용)
-
Spring Web 추가
5. application.properties 코드 작성
spring.mvc.view.prefix=/WEB-INF/views/
spring.mvc.view.suffix=.jsp
spring.mvc.static-path-pattern=/resources/**

spring.datasource.driver-class-name=com.mysql.cj.jdbc.Driver
spring.datasource.url=jdbc:mysql://localhost:3306/schema
spring.datasource.username=root
spring.datasource.password=root
server.servlet.encoding.charset=utf-8
server.servlet.encoding.enabled=true
server.servlet.encoding.force=true
spring.mvc.view.prefix=/WEB-INF/views/
-> view 경로 설정
spring.mvc.view.suffix=.jsp
-> view 포맷 설정
spring.mvc.static-path-pattern=/resources/**
-> html, css, js 경로 설정
spring.datasource.driver-class-name=com.mysql.cj.jdbc.Driver 하위 내용
-> MySQL Driver 설정
6. pom.xml 코드 작성
-
<dependency> </dependency> 안에 아래 코드 작성
<!-- TOMCAT -->
<dependency>
    <groupId>org.springframework.boot</groupId>
    <artifactId>spring-boot-starter-tomcat</artifactId>
    <scope>provided</scope>
</dependency>

<!-- JSP -->
<dependency>
    <groupId>org.apache.tomcat.embed</groupId>
    <artifactId>tomcat-embed-jasper</artifactId>
</dependency>


<!-- JSTL -->
<dependency>
    <groupId>javax.servlet</groupId>
    <artifactId>jstl</artifactId>
</dependency>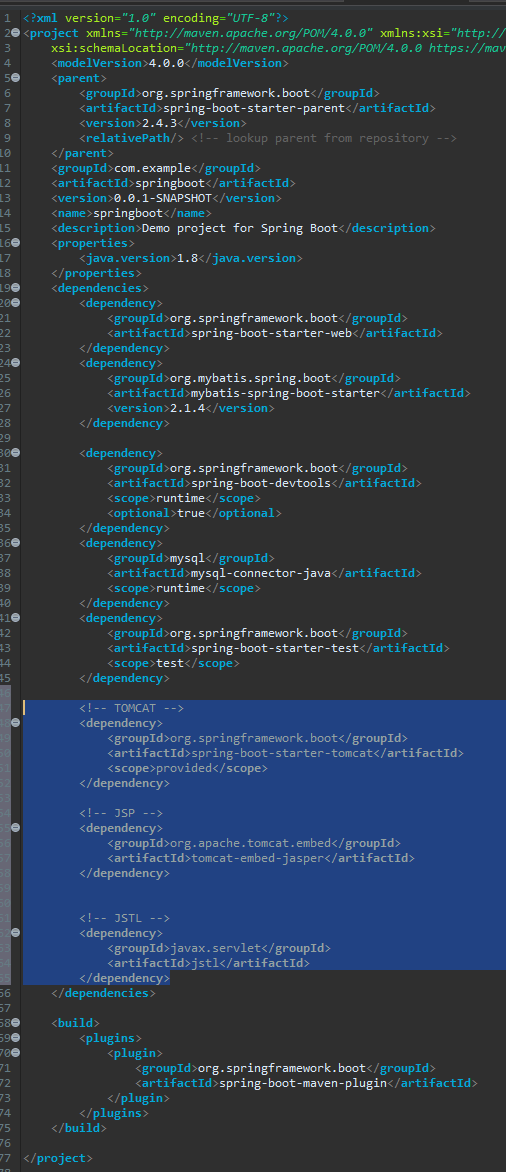
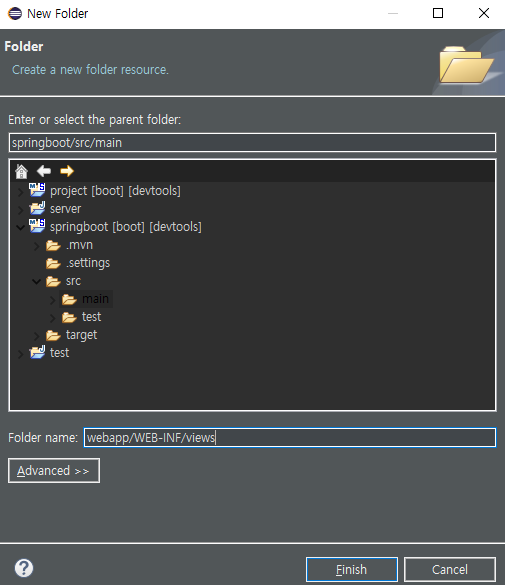
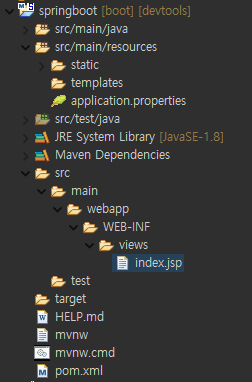
7. index.jsp 생성 및 코드 작성
-
src/main/webapp/WEB-INF/views 디렉토리 생성
-
views 하위에 index.jsp 생성 및 아래 코드 작성
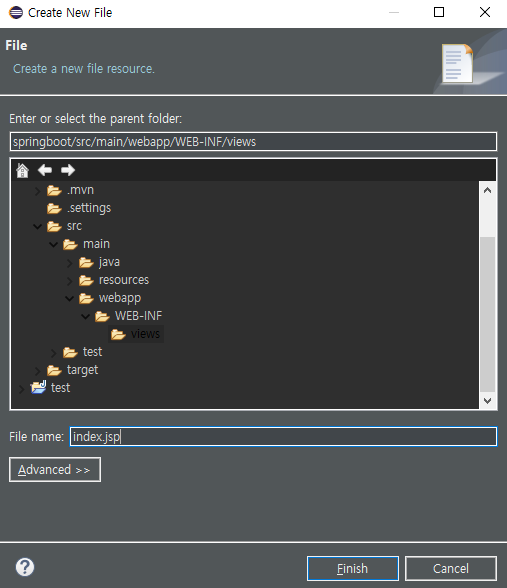
<html>
<head>
<link type = "text/css" rel = "stylesheet" href = "resources/css/main.css"></link>
<script src="//code.jquery.com/jquery-3.2.1.min.js"></script>
<script src="resources/js/main.js?v=<%=System.currentTimeMillis()%>"></script>
</head>
<body>
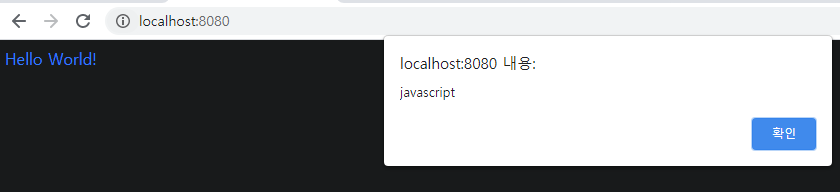
Hello World!
</body>
</html>8. MainController 생성 및 코드 작성
-
src/main/java/com/example/demo 하위에 MainController.java 생성 및 아래 코드 작성
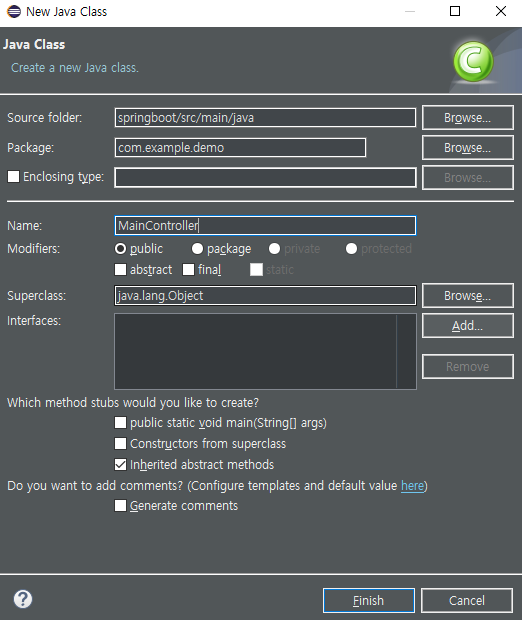
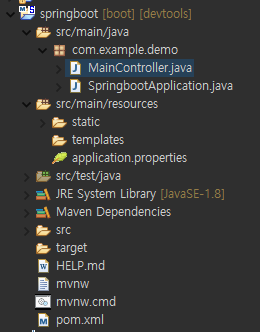
package com.example.demo;

import org.springframework.stereotype.Controller;
import org.springframework.web.bind.annotation.RequestMapping;

@Controller
public class MainController {
    @RequestMapping(value="/")
    public String main() {
        return "index";
    }
}
9. main.css 생성 및 코드 작성
-
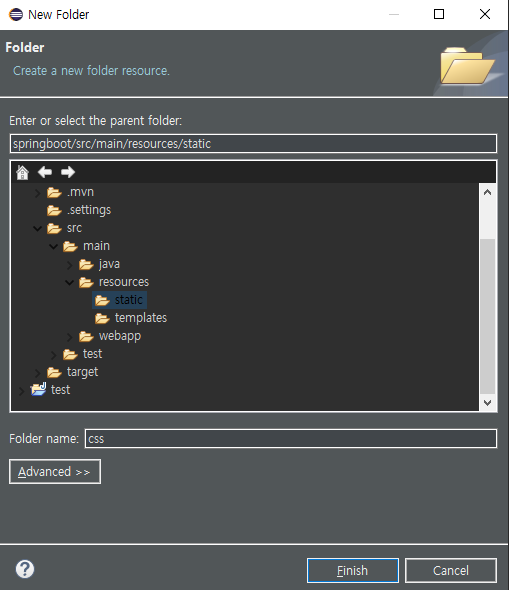
src/main/resources/staic/css 디렉토리 생성
-
css 하위에 main.css 생성 및 아래 코드 작성
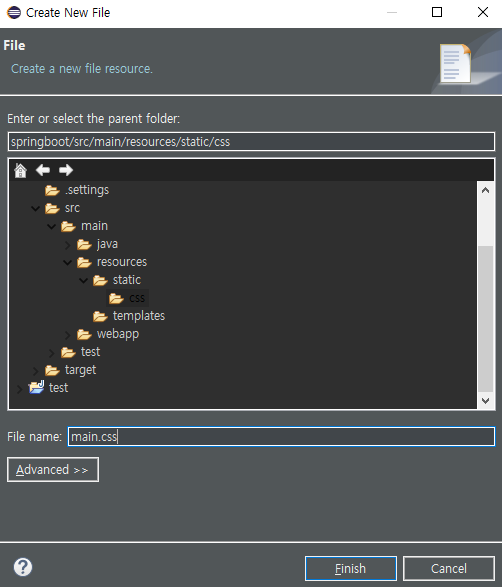
body {
color: blue;
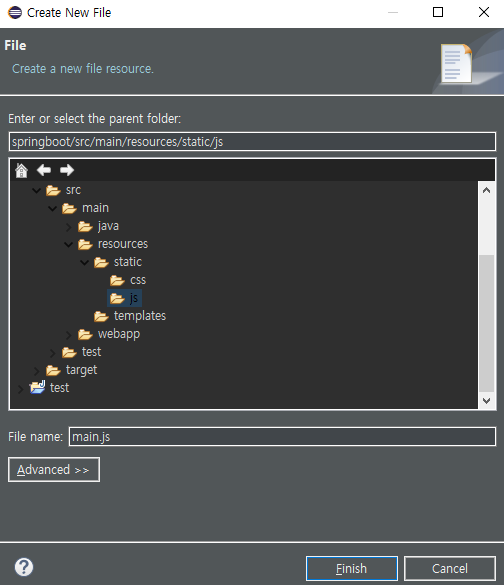
}10. main.js 생성 및 코드 작성
-
src/main/resources/staic/js 디렉토리 생성
-
js 하위에 main.js 생성 및 아래 코드 작성
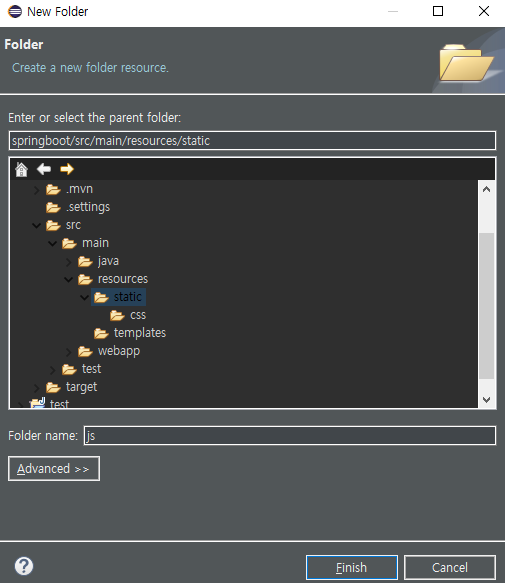
$(document).ready(function() {
console.log('javascript');
alert('javascript');
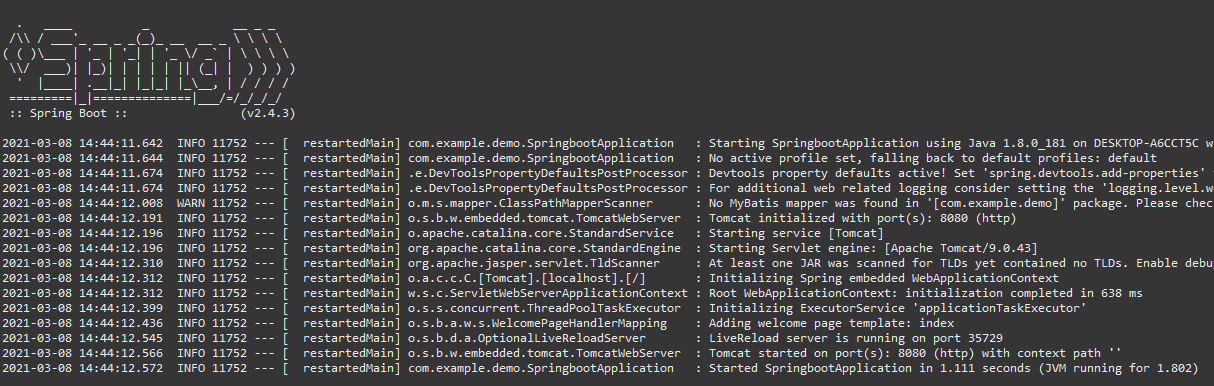
});11. Spring Boot 프로젝트 실행
-
프로젝트 우클릭 -> Run as -> Spring Boot App 클릭
- 브라우저에서 localhost:8080 접속
(css, javascript 적용 확인)